Currently refreshing myself on system design I stumbled across an interesting site with a bunch of research articles. They appear to cover many different topics including Games Development, Mobile Development, Programming etc.
Just listing these here to refer to them in the future. Not specific to our project but I thought it might be useful in the future and my own game dev projects. Background information and such.
I spent some time last night and the day before porting out the first Minigame to build a demo for Dr.Claus. I ran into a problem when creating a UI for my game. Without the Oculus Rift creating a UI was trivial.
A standard canvas worked fine and elements resized themselves nicley along the anchor points implemented in 4.6 of Unity. However when using the Oculus the UI would not show up at all.
I have been googling around as time permits to look at how others have gotten around this. One solution was to roll back to Unity 4.5.5#. This would solve the problem but means no fancy new UI features and probably a lot of annoying UI code.
The other solution I found on Youtube was to use a Canvas but setting it to world space. I tried this out and it works a treat.
However, I saw a post on Unity Answers mentioning that on the Oculus forums they said Unity 4.6 is not supported on Unity 4.6. And that people were having trouble seeing anything on the actual Rift hardware when using Unity 4.6. Additionally there have been reports of Input issues when using 4.6 with the Oculus.
I posted a request on the Team Blog asking any team members to try and snag us a Rift so that I can run some tests. I am unfortunately unable to get a Rift out myself as every time I have tried I am at work whenever a Rift is available. And I have been trying to organise this process via e-mail which is very difficult even with the Tech staff being very supportive.
If this is the case, then we would have no choice but to roll back to the supported 4.5.5# build. This means more implementation time for UI elements. I'll keep working on this today, but my current focus is getting a demo to Dr.Claus.
Need to rethink this, when playing on the rift this might not be a good feature.
Taken from the Oculus Best Practises documentation - Page 2-3, 'Avoid visuals that upset the user’s sense of stability in their environment. Rotating or moving the horizon line or other large components of the user’s environment in conflict with the user’s real-world self-motion (or lack thereof) can be discomforting.'
The display should respond to the user’s movements at all times, without exception. Even in menus, when the game is paused, or during cutscenes, users should be able to look around.
Use the SDK’s position tracking and head model to ensure the virtual cameras rotate and move in a manner consistent with head and body movements; discrepancies are discomforting.
Create immersing UI
Work in progress
Keep in mind the following from the Oculus Best Practises documentation 'Maintain VR immersion from start to finish – don’t affix an image in front of the user (such as a full-field splash screen that does not respond to head movements), as this can be disorienting.'
Add timer until victory - Added, need to hook up to code
Still the case
Add defeat once rotation meets X position
Replace placeholder assets
Integrate and test on Occulus Rift
Got this up and working for 4.6. Can make this work in 4.5.5#. Need to do more research.
Left on IR minigame:
I also started looking into Infrared for use in space exploration using the links on our group blog that Begoña posted. I have a few ideas knocking around that I hope to work on. I need to find a fun way to implement this idea rather than have a simple "press B to scan" game.
/* Version 0.8 - Added Raycasting when camera is balanced directly on planet. * Added timer, no code hook up yet */
Not been able to complete as much tonight as I was preparing for our team meeting tomorrow. I still need to scan in my notes I made about this minigame as well. It's still in my notebook.
Additionally need to scan in and computerise my case and class diagrams. Again in my notebook.
Functionality idea: Adding obfuscation by having different colliders around for the raycast to hit. On hit return data based on colliders type/name/tag or layer. This would result in different levels of feedback. Meaning that I could use this technique to have the player return different levels of 'fuzzy' data/photo's. The more centered they aim, the better the result, the less accurate they are, the worse.
Left to do on this minigame:
Create UI to inform users they should use Thrust.
Create immersing UI
Add timer until victory - Added, need to hook up to code
Add defeat once rotation meets X position
Replace placeholder assets
Integrate and test on Occulus Rift
Left on IR minigame:
Need to cover this with the team tomorrow as there may be some confusion about how this minigame is being presented.
Note to self: Don't forget to import the Occulus Rift APIs. Perhaps export package into new project set up properly for VR support. Would be more organised that way.
Note to self:Do
we want photos to be taken automatically or via player input? Easy to implement either way code-wise. This
will be down to play testing. If the balancing mechanic is very active (which it is currently) having
the player take photographs manually will become difficult and annoying.
Need to playtest demo once timer is hooked up.
I want to start getting these things done and out of the way. I feel the time for research is over and it is time we move onto implementation. As such I started work on one of the 5 minigames today. I intend to finish it (code-wise) by tomorrow and have the next one started by then. I am aiming to have two minigames finished by Tuesday. This is because I want to show them to Dr.Claus who is waiting to play some demos. And generally time will be running short, pretty soon.
Balancing Mini Game summary:
First proposed by our mentor as something we might be able to think about doing, I took the idea and ran with it. After telling the team about it (here), I started design and implementation of the minigame.
The minigame will have the player facing a planet (or moon at the moment), as if they were the probe or orbiter. They would have to look at the planet/moon and take photographs to send back to earth.
During this mission, a piece or debris or a mini asteroid hits the probe/orbiter and knocks off one of the buoys responsible for balancing it.
The player now needs to balance the probe/orbiter back to the 'sweet spot' to gather the required images. The player will orbit along a rough axis (halfway between X and Y) and need to use the game pad or keyboard to rectify themselves back towards the planet.
While doing so however, due to the damage suffered the player may veer off balance once again. This can be rectified using the Thrust feature (A button on a pad or W on keyboard). This will allow the player to regain control of the probe/orbiter and continue attempting to rectify the balance.
Current version - 0.7 looks like this:
Example of current build
The above image is what the mini game starts off with. It will remain in a paused state until any key is pressed (either keyboard or pad). Once done, the game will start and the UI is be hidden away.
It looks a bit rough at the minute as I threw together the UI in photoshop in a few minutes. The skybox is a placeholder from Luke at the moment and Begoña's Tritan moon model looks pretty sweet but is also not completely done yet.
Balancing Mini Game Changelist:
Change List across versions
Full source code is avaiable in my Github repository which can be found here.
Work left to be done:
Add raycast to moon (Basically how I intent to make a 'sweet spot')
Well we finished our game jam on Monday and managed to submit a build with 5 minutes to spare! Talk about cutting it close.
During the game jam I learnt how to use the new UI system and also how to attach scripts to the UI's new GUI system. Can't say I liked this new GUI system at first but the more I used it the more I saw how I could save time using it.
Game Jam entry is here - the build has a few bugs, but it's stable at least.
I'm taking this weekend off to do a game jam with a team of awesome people I gathered up from different walks of life. I am hoping to use this game jam to just have some fun and not forget why I'm doing this Msc in the first place - to make games!
But doing this game jam will also give me a chance to test out the new GUI system that Unity 4.6 has implemented. I am hoping to apply what I learn in the game jam to help speed up the simulations UI development. As this is not something any of us has thought about in-depth.
I will post a link with more details on how my game jam is going in my personal blog here. For now here's an example of something I made tonight (also works with X360 controllers!):
Now that I got my raycasting working in my other prototype my next step was to get an Infrared mechanic up and running. We intent to use photography in our project (please see Lukes blog post about this here). Since we are planning to use this I had to come up with a way to implement this.
Akshayan had a very good point that we should do it in a non-boiler plated way. To allow the Astronautics department to edit the mechanic if they so required. This was a very good idea and I kept it in the back of my mind. To implement this mechanic I wanted two major things,
Get input (via the X360 controller).
Change the texture (material really) of all objects that will be affected by the Infrared mechanic.
Before I bore you to death with my blog post this is what the end result of this mechanic looks like, I attached it to the rotation prototype:
Please note that this is only v0.1 and the textures along with most assets are a placeholder. Thanks Luke for the cool skybox :D
Adding the Scan-mechanic to the X360 controller
The first thing I had to do was bind an 'Infra' preset (I set this up in the inputs menu in the engine) to Axis 3. This axis was what the two trigger buttons were tied to. Once done I could manipulate the triggers.
I wanted to know what floating values were being assigned to each trigger as both trigger buttons share the same axis. I could have looked this up on the API reference but I felt like experimenting tonight! I added a statement so check if the Input axis values was greater than 0, just to see what happened.
This didn't work as I had hoped as the left trigger was greater than zero and letting go of both triggers was also greater than zero.
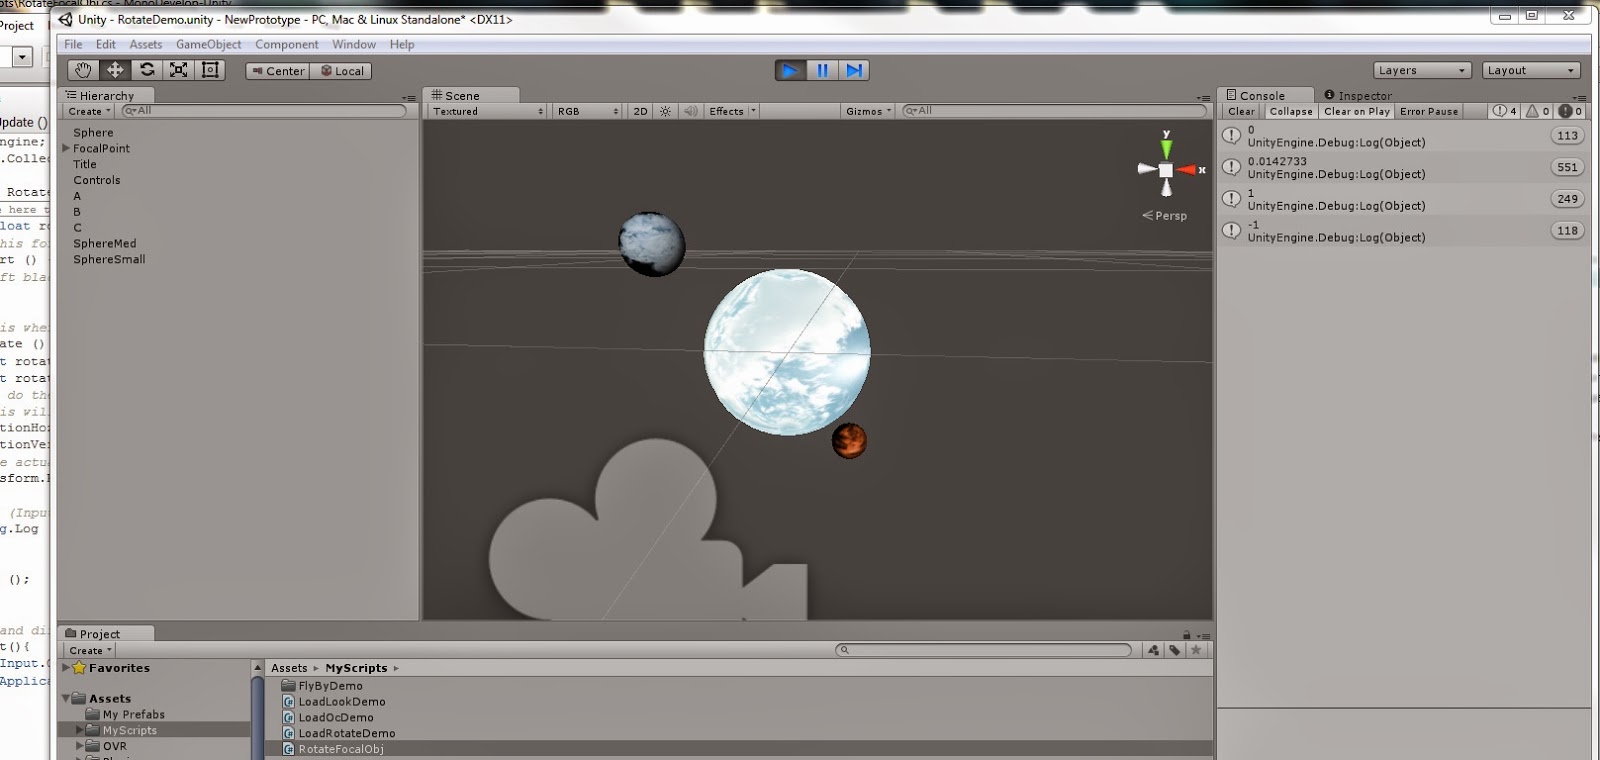
So I thought I'd just output whatever values were being assigned to the axis depending on what trigger I held down. And what value was outputting when I had no trigger held. So I added some console prints:
Adding Debug Text to output Axis
And this showed me that the left trigger was being read as Infra, and had a floating point value of 1. The right trigger had a floating point number of -1 and no trigger being held down output a 0.
Throwing out some debug text to see axis values
Now that I could get the trigger inputs I could use them to do something cool, like for example change the material on a game object if I held the trigger down. Then change them back if I let go of the trigger.
I did this by first assigning 3 variables to store the default materials of the three planets. That way I could change the materials back to the original ones when I let go of the triggers.
Next up I had a condition that checked to see if the 'Infra' axis value was greater than 0.5. For some reason it instantiates at 0.014... so I couldn't use greater than 0. I'm not sure why it reads input like this then shoots back to 0. This might just be my old X360 pad's wear and tear.
But for now as a work around I just use the value 0.5. This means that if the left trigger is held down (axis 3 reads 1) the condition is true.
My Trigger Down Code
Now I just had to replace the debug code with the actual Infrared feature. To do this I assigned a public Material variable and used the engines Drag-and-drop method of attaching a placeholder Infrared material I whipped up. I did not hardcode the Infrared material into the script as I want the Astronautics department to be able to modify the material is they so choose. As Akshayan's idea about a modifiable system was a very good one. So for now I did this quick and dirty.
So the final code is pretty simple. I swap the materials from defaults to 'Infrared mode' while the left trigger is being held down (checked once per frame). And when I let go of the trigger (Axis 3 goes from 1 to 0) the default mats are loaded in again.
Swap Mats Code
The end result is a material swapping mechanic that can give us a cool infrared scanning mode!
Normal Mode
Scan mode!
Even though all the assets are placeholders and could look better, the mechanic works!
Other tasks done today:
Gave Matias and Konrad the contact details of the Kingston College staff member. This way they will be able to take point with this and gather the required information for their student feedback surveys. They will also need to make the amendments to the survey the tutor asked for. I figured this was better than me being an unnecessary middle man.
Got in touch with the technicians again to try and get my hands on the Oculus Rift. Was given details of two people who currently have the two DPK1's signed out. So my next step would be to contact them and ask if I could snag one for a day or so. Probably put this on the backburner until I have something concrete to test out since I don't want to waste peoples time.
Quick notes, I e-mailed the module leader at Kingston College to see if they had time to review our survey for the UX guys stuff. Hoping to hear back sometime this week.
As a precaution we might have to start looking into other options. I won't have time to do this and develop so one of the UX guys might have to take over here.
I also e-mailed the technicians about the Oculus Rift again, as I missed them on the 18th when I dropped by. Trying to organise access to the hardware for sometime in the next few weeks to run my prototypes.
That's it for now as it's very early and I'm still blurry eyed.
Ok so this has a lot less math and a lot more fidgeting around with the engine. The end result is a lot less code as I depend on the engine to do most of the brunt work.
I never used Raycasting before, so I made use of the Unity video tutorial (found here). And as always the Unity API references.
It seemed pretty straight forward and it was. The most trouble I had was adjusting my Raycast to work well with my world. I ran into the following Hicups:
My Ray was attached to my camera, as this is what I was looking around with. The cube infront of my camera would get in my way and constantly block all other collision my ray might have encountered. The same issue happened to my Respawn-boundary I set up.
To fix this I added the planets to a separate layer and used to optional arguments to ignore everything outside of this layer. As an added precaution I instantiate the ray at the (cameras position)*2 to avoid the cube entirely so this would fix the issue regardless of layers.
My ray was defined as:
Ray ray = new Ray(gameObject.transform.position*2, gameObject.transform.forward);
And my collision check was done as:
if(Physics.Raycast(ray, out hit, 500, 9)) [...] Where 500 was the length of the ray and 9 was the layer to avoid.
At first I was using Mathf.Infinity as the rays distance, but found it tricky to use with the debug visual I had set up (to see the raycast in-engine while running).
As such I changed the distance from infinity to 500. This made the debugging code work and I could see the raycast properly.
One final snag was where I was updating a value in the wrong method (not per frame) which meant the raycast wouldn't rotate with the camera. A minor oversight which I quickly fixed and the final result was a new "Look at object" mechanic that used raycasting.
This method of work is a lot easier to use as I use the engine to do a lot of the work for me. At the moment it's a bit to precise with the raycast, meaning I have to center the camera exactly at the right spot. I could fix this by tweaking the collision boxes.
However as this is just a prototype and we have yet to build the actual assets for use, this will not require tweaking until later.
As I mentioned in the presentation I used the dot product to multiply two vectors together. To find out at which angle I was viewing a game object (b) from a different game object (a).
I first found this solution by searching around on the internet. I found some psueodo code (which I will post at the end) which made mention that the dot product would be ideal for this, as such I started reading into the math some more. I did this as I feel that I could learn a lot about how this mechanic would work if I delved into the details a bit. Also I am not overly confident on my math skills so I always try and sponge up as much as I can/when I can.
The Dot product is defined as:
We do not list (ax . by) or (bx . ay)as these equate to 0. By rotating the vector b to a baseline (to 0 or the x-axis) we end up with:
We have the vector a multiplied by the vector b which is equal to the magnitude (length) of vector a multiplied by vector b multiplied by the cosine (the angle between the two vectors). This can be calculated and will results in a scalar value (a single number). Which we then use in some way which I will describe in my code below. I'm pretty happy I spent some time reading up on sin and cos as I mentioned in a previous blog post. It seems that they are used often in 3D calculation in games and simulations. From what I have seen over the last few weeks I'm going to need to spend some more time brushing up on my 3D math skills. At least I learnt SohCahToa! So I know that we could calculate the cos in the formula above by multiplying the Adjacent with the Hypotenuse of the angle between the two vectors! Isn't it amazing what you can learn with google? Even though I understand the fundamentals of the math behind this I still would like to spend some time reading up on this. Unfortunately this is only one mechanic and there are many more I need to develop! So I will have to make a note of this and put it on the backburner for now. The sites I used to research Dot product were Wikipedia, Better Explained, Mathisfun and the Unity API reference. Now that I had the dot product I looked at what vectors I would need to use. According to the API reference I would use the .forward of the gameobject I wanted to have look around (so in this case the camera). Additionally I would need to get the direction of the target object from my (camera's) current position. This made sense when comparing it to the psuedo code I found online. The only difference was the psuedo code normalized the value (so between 1 and 0) after working out the direction of the view object from my camera. This was done probably for ease of use when it came to comparisons (if greater than 0, less than 0.5 etc). The psuedo code can be found here and I will list it below as well:
Understanding the psuedo code was trivial after learning what a Dot product was. Now that I understood this solution I could start implementing it. It would require some set-up first however. Before manipulating the vectors (which would be Vector3s) I would need to get the coordinates from transforms and store them in variables, then build the required Vector3s based on those coordinates. So in closing I came up with the following code solution:
using UnityEngine; using System.Collections;
/*This script will return output based on the angle an object is being viewed at from a different object (in this case the camera) It does this by using the dot product to multiply the two Vector3's of the two game objects. Taken from the API reference, the dot product is a float value (a scalar value) equal to the magnitudes of the two vectors multiplied together and then multiplied by the cosine of the angle between them. (The cos would be the angle between the two Vectors) */ public class LookAtObject : MonoBehaviour {
//Initialising some vars to store coordinates of the objects vectors Vector3 myCurrentFront; Vector3 planet1Pos; Vector3 currentPos; Vector3 dirMeToObj; Transform tmpStore; Transform tmpMyVec;
//If we are viewing the secondary object from x angle this is toggled and we have output public bool IsActive;
// Use this for initialization void Start () { IsActive = false; }
// Update is called once per frame void Update () { calcLookAt(); }
void calcLookAt(){ //We get the current facing of the primary game object //We use this to ensure the other game object is infront of us myCurrentFront = gameObject.transform.forward;
//Temp store for the other objects transform (Planet1) tmpStore = GameObject.Find("Planet1").gameObject.transform; //Primary game object's (camera) transform is stored in here tmpMyVec = gameObject.transform;
//Storing each separate coordinate for a vector, from both primary and secondary game objects //This is to build two Vector3's to be used in the Dot Product calculation tmpMyVecX = tmpMyVec.position.x; tmpMyVecY = tmpMyVec.position.y; tmpMyVecZ = tmpMyVec.position.z;
//Building the new Vectors to be used in the comparison calculation planet1Pos = new Vector3(tmpStoreX, tmpStoreY, tmpStoreZ); currentPos = new Vector3(tmpMyVecX, tmpMyVecY, tmpMyVecZ);
//Gets the magnitude of the primary object to the secondary one and then normalizes it dirMeToObj = (planet1Pos - currentPos).normalized;
//180 degrees infront of us - performs the .Dot product calculation between the direction value and the front facing part of the primary objects transform if(Vector3.Dot (dirMeToObj, myCurrentFront) > 0){ //Debug.Log ("Looking at Planet Area at 180 degrees"); }
//90 degrees infront of us if(Vector3.Dot (dirMeToObj, myCurrentFront) > 0.5){ //Debug.Log ("Looking at Planet Area at 90 degrees"); }
//45 degrees infront of us if(Vector3.Dot (dirMeToObj, myCurrentFront) > 0.75){ Debug.Log ("Looking at Planet Area at 45 degrees"); Debug.Log (Vector3.Dot (dirMeToObj, myCurrentFront)); //used for debugging IsActive = true; }else{ IsActive = false; } }
public bool getIsActive(){ return IsActive; }
}
This all works pretty well (as I demonstrated in the presentation). However as a few developers informed me, it would be much easier to just use Raycasting. With that in mind, I looked into it and I'll show my findings in my next post.
As we do 99% of our collaboration on a private Kingston Uni protected Facebook Group page, we were concerned that we would not be able to show how we were working together as a team. As such we decided to follow the good examples set by the other teams and move over to a blog based communication system. Even though the Facebook Group page was easier as it updated quickly in real time, for tracking purposes it was not ideal. The problem however was that even after we switched we still had 3 weeks worth of collaboration listed on the Facebook group page. We had to find a way to archive this data. Luke selflessly volunteered to manually copy the data from the group page but this seemed like batch work to me and something we could script. I spent a few minutes tonight looking at the Facebook developer page and looking into the Graph API. I used this API along with the online Explorer Facebook provides to write a query. This allowed me to pull down all the data from the group page. Video's and Images may have to be manually re-linked as they are currently linked to the group page. The first thing I had to do was get an access token to gain access to my groups. Using the explorer made this easy:
The link to the Graph API explorer can be found here: https://developers.facebook.com/tools/explorer I messed around with the search queries using good old API references: https://developers.facebook.com/docs/graph-api/reference/v2.2/group/ I then worked out the right query to pull the data I required. At first I used: me?fields=id,name, groups This gave me a list of my ID and name followed by all my groups along with group ID numbers. I could then use the Astronautics Simulation ID ( "id": "584844028286125") to write the following query: 584844028286125/feed?until=now. Which spat out all the raw data for archiving. Not ideal as the data in a raw form:
[...] { "data": [ { "id": "xxxxxx", "from": { "id": "xxxxxx", "name": "Deon Cresswell" }, "to": { "data": [ { "name": "Astronautics Simulation", "id": "xxxxx" } ] }, "message": "Sketch is now updated and on Dropbox", "actions": [ [...]
but it beats spending an hour or so copy/pasting! Other tasks I did tonight (will update in more detail tomorrow):
Replaced coordinate tracking system in the Tracking prototype with a Raycast, the engine does most of the brunt work now.
Started work on a texture replacement mechanic (although I'm still looking to see if this is the best solution)
Need to write up a scope document or project definition document. Now that our supervisor has approved of our design Matias volunteered to do this.
Replace my 'trigger look at' function with Raycasting. I read up how to do this in Unity and shouldn't be to difficult really. I'll try and push out a build with that today.
I also need to look at replacing textures on objects during runtime. I've done this before so again, it should be doable.
The team agreed to start using the team blog for discussions as up to this point we were using a facebook group and facebook chat. Using the blog might make it easier when it comes to marking.
Tonight we all met on facebook to
help Matias who was compiling the presentation. In case he had any
questions regarding our slides.
After that we had a
quick Skype call (Deon, Luke, Matias and myself) to discuss who was
covering which area of the presentation. We also followed up with other
members about areas we were unsure about which they specialised in.
The
final version of the presentation is now on dropbox and Deon, Luke and
myself will meet up a bit earlier tomorrow before the lecture to make
sure we are ready and not missing anything.
Other Tasks:
In
other news, Matias e-mailed our project proposal a while back and our
mentor came back to us. Thankfully he was happy with the design we
settled on. Matias is organising another meeting with Dr.Claus so that
we can show him what we have been up too. I hope he likes our work thus
far!
I also set up a Github repository for the project.
I can upload all my code here (it's empty for now apart from all my
personal projects). This might be useful at a later stage.
As
a side note I linked my Github to my Linkdin so people who view my
profile can access all my source code as well. Saw a few companies who are now asking their applicants to have a github account. So I'm glad I
got one set up. Staying relevant! :)
Finally, I started messing around with
Visual Studio using my Unity scripts and I will be swapping Monodevelop
for VS in the near future for development.
Who was going to present (we decided on Luke, Deon, Rob)
AK was happy for me to present the programming part as he is very busy with work/assignments and had to play catch up.
Discussed different parts of the presentation (each area of expertise, UX, Games Design, Animation, Programming) and how they should fit together
Begoña and Melina are going to send me compiled slides/assets to cover in the presentation.
Covered the overview of the project and how it should be presented - discussed the presentations general overview and how we were doing this.
I will talk about the project overview / animation areas / development areas / conclusion
Luke (and Deon) will talk about the Project goals (what we are trying to accomplish) / Design / Gamification and Research
We'll make sure Matias has the slides for compilation by today/tonight
We can add in Melina’s stuff tomorrow along with the other compilation
(I'll have a conversation with Matias today at some point)
Sub-Tasks before Tuesday:
Deon will get his slides to Luke sometime today (23/11/2014)
Begoña will send me her slides at some point tonight (23/11/2014)
Melina will send me some assets tomorrow (24/11/2014)
In general everyone seemed quite keen to get things done and we all had some very valuable input. Many thanks to all for taking some time out of their week end!
At the moment we are awaiting approval from our mentor and we hope he is happy about our preferred design. I thought it would be a good idea to cover our agreed upon design before going into detail on the mechanics - please see below: Design Proposal overview: We brainstormed for a while and one key point which kept coming up was how the use of the Oculus Rift was pretty rigid, in terms of user engagement. Using the Oculus Rift meant that only one person would be able to experience the simulation at a time. At an expo this is not ideal, as foot traffic would keep passing and not be engaging or learning anything. It would not do to simply have a giant screen with output taken directly from the Oculus Rift as the images would be stereoscopic and not look at all good. The output would be split into two separate camera lenses and appear blurry. It is due to this that we came up with the idea of splitting up the simulation. At first we looked at a way to combine different types of cameras in the Unity engine. Attempting to have a dual-screen set up, one screen (the Oculus Rift really) would be stereoscopic and another screen (a standard display) would be a normal Unity camera. Our attempts to make this work did not go well and it crashed the engine a few times. Even though there may be a way to get this idea working it would require a lot of work. As such we then decided to just do two separate, modular simulations. The one simulation would use the Oculus Rift and the other would be more informative and run on a standard display of some description. The Oculus Part: The Oculus Rift part of the simulation would deal with user engagement and have the most user interaction. This section deals with informing the user about Neptune and all the data we gather from it. The player would use the Rift to look at Neptune and investigate the planet as if they were the probe orbiting the planet. Currently the games designers are looking into ways to make the gathering and measuring of data interesting. This part of the simulation will need to be the most game-ified. (I have also been working on a LookAtPoint functionality which would allow feedback based on points in space (Vectors) being looked at. More on this in my next post.) The Presentation Part: The next part of the simulation deals with engaging users who cannot or do not wish to use the Oculus Rift. It will also inform the users of the journey a probe would have to make from Earth to Neptune. This will have some limited user interactivity in some way but for the most part will be a presentation that can be watched on a standard display. The UX-designers are currently working on this part of the simulations display. The idea is that users who are waiting to use the Oculus Rift Simulation can watch the journey the probe would have to make. They would then gain a greater appreciation for the Oculus part of the simulation as the probe has reached Neptune. We are currently awaiting approval but we are also starting some generic work with this design in mind as we have a presentation deadline on the 25th.